Halloween Trunk or Treat Fun with Awesome Pumpkin Decorating Ideas




Halloween is a time of fun for kids and adults alike. Dressing up, going trick or treating or to a party, eating lots of yummy food, and decorating pumpkins is all part of it.
After a trip to Trunk and Treat at a local school, I felt compelled to share some of the awesomeness we say, especially for awesome pumpkin decorating ideas.

On a Friday night, the younger boys and I went to D’s school for their Trunk or Treat.
It’s one of the annual fundraisers for the PTA and I was amazed at how many people from the surrounding area come to enjoy the festivities.
I was quite glad that we’d had a really long fall and snow didn’t start flying until later in the evening.
It was still cold for this Louisiana-bred gal, though.

My pragmatic boys commented that we could have bought more candy for the admission fee for the boys than what they received.
But, it was fun to see people dressed up along with some of the vehicle decorations.

Pumpkin Decorating Ideas
One of my favorite things inside was checking out the pumpkin decorating ideas that the different classes came up with.
The ‘Jason’ pumpkin is the 6th-grade class’s submission. That’s the class my son was in.
Like the ‘Jason’ pumpkin, some of the submitted pumpkins used paint in the decoration process.
Others used cut-out paper and other items glued onto the pumpkin to create something special.

Here are a few of my favorites.
Create one for your house and I am sure there will be many compliments on this awesome pumpkin decorating idea.
This post contains affiliate links that may generate a commission for purchases made through them. There is no additional charge to you for using them.
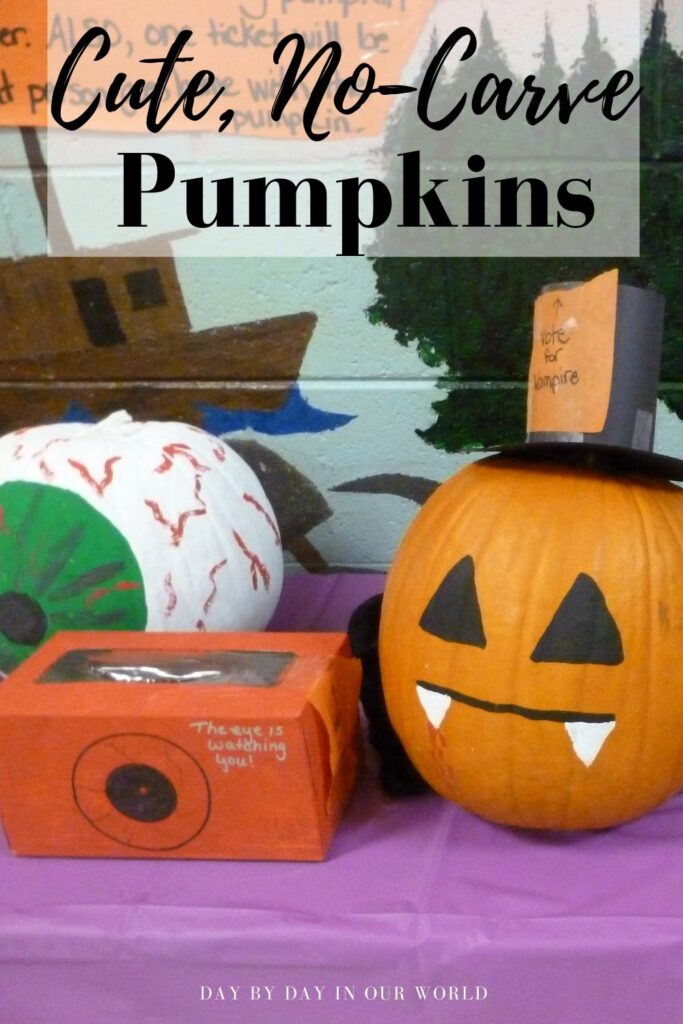
Super Easy Vampire Pumpkin
This one can be made by the younger kids with little assistance.

For this one, you need both black and white paint.
I’d suggest Tempura paint that cleans up easier.
Then, decide how tall you want for the black hat.
Trim a piece of black construction paper to be the right height.
Roll to form the sides. You can use double-sided tape to close it.
Then, carefully cut a circle piece to fit the top. Attach it with glue or tape.
If you have a small black cape, affix it to the back.
Otherwise, a piece of black cloth will work.
A satin finish will look best.
Disco Ball Pumpkin with BoomBox
Embrace the 1970s and early 1980s with people dancing or skating under a disco ball.
And how many of us had a boombox to provide the tunes?

This one can use simple items found around your house.
Start by painting the pumpkin silver. This could be via a spray can of silver paint for a light and even application.
Then cut out small squares of cardboard or cardstock, approximately 1 to 2 inches on the side.
If you are using cardstock, the task can be completed more quickly with a paper cutter. Just don’t let little kids take a turn with it if you own a guillotine-style one.
Wrap them in aluminum foil. I recommend aluminum foil sheets if you want to speed up the process more safely.
Glue them to the painted pumpkin with even spacing.
For the Boom Box, find a rectangular box similar in size to a boombox.
Paint it silver.
Trace out the controls in pencil for placement.
Use permanent markers or paint pens to draw on the controls.
Nemo Themed Pumpkin

This is one super adorable no-carve pumpkin to make.
Kids and adults alike love this idea.
I’m thinking the Nemo one would be even better using a permanent pumpkin form from the craft store.
That way you can enjoy it year after year like a good gingerbread house.
You’ll need at least 2 small bags of candy corn (or one LARGE one) to glue onto the pumpkin.
To really stick, you’ll want to use a glue gun or rubber cement (which does stink when being used!)
Start at the bottom of the pumpkin when gluing on the candy corn.
To make it easier to accomplish, find a lazy Susan to hold it and spin. Or a large plate or platter that you can spin on the table.
While you can buy Nemo-branded figurines, there are generic tropical fish ones that cost less. These are also attached via glue to the tops of the candy corn.
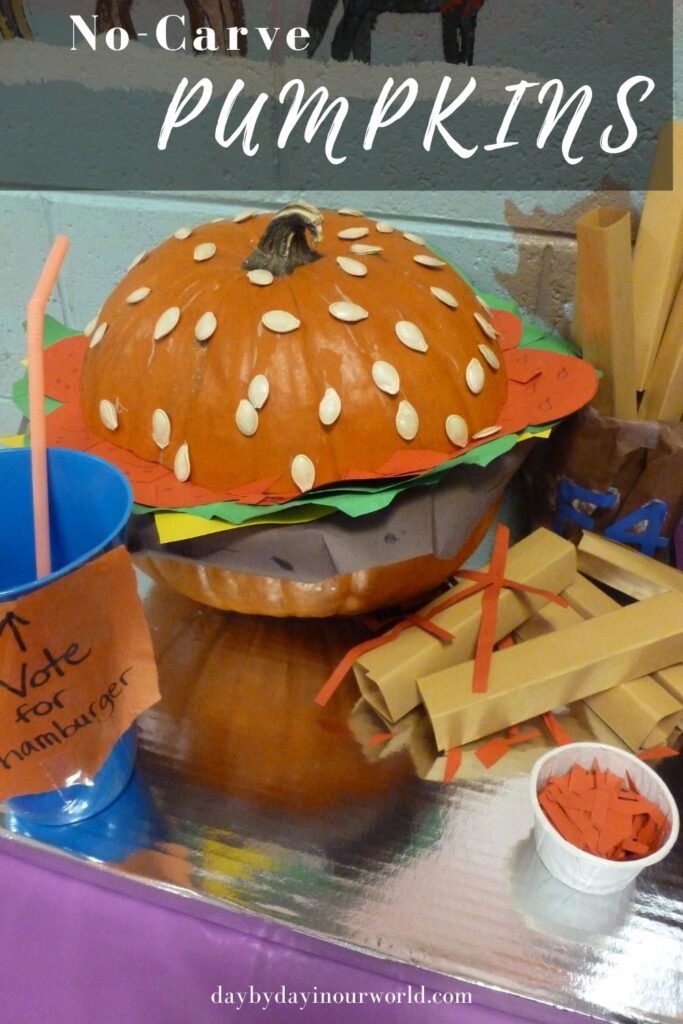
Hamburger & Fries Display

A burger and fries. A favorite meal of many people, especially kids.
Instead of eating one, you can create a tray display showcasing a hamburger pumpkin with fries and ketchup on the side.
This one does involve some cutting of paper.
But, kids with scissors on construction paper is FAR nicer than a knife to carve the pumpkin!
You’ll also need some pumpkin seeds to give the sesame seed effect.
Construction paper colors used include:
green for the lettuce
red for the ketchup ‘strips’ and the tomato for the burger
tan for the fries
yellow for the American Cheese
brown or black for the burger
If you are going for a temporary display, then most any glue or tape will work.
But, if you are using a carvable pumpkin form for a permanent display, then you will want a glue gun.
Is your family celebrating Halloween or Fall Harvest this year?
Which of these pumpkin decorating ideas do you like the most?
More Fall Themed Posts
Ready to embrace all things fall from decorating to making up delectable items? Here are some other posts to get you started.


Note ~ This post was originally published on Oct 29, 2014. It was updated with supplies needed to make some of the pumpkin ideas shown here.
These are such fun pumpkin decorating ideas! That hamburger one was to creative and cute! Loved it.
That hamburger pumpkin is so clever. I think it’s my fav!
Thanks for sharing at #anythinghalloween!!
That Finding Nemo pumpkin is so incredible! I love the idea of decorating pumpkins or turning them into a DIY project.
LOVE this!! Such great ideas. We’re decorating a pumpkin to display at my son’s school on Friday and these will definitely help us decide what we want to make.
I love these pumpkins! Nemo is REALLY impressive.
Those look so adorable! Halloween is so fun!
This is the first year I’ve heard about trunk or treating, and it suddenly seems to be everywhere. We’re celebrating this year, but we’ll probably just do some regular house to house candy collecting. 🙂